Shooting Details: shooting and guide hand placement / function
The next few basketball tips will discuss some of the important details in regards to shooting the basketball properly, efficiently, and consistently. As defined by the merriam-webster dictionary, a detail is “a part of a whole.” Details are the small elements of the whole that are often unnoticed, overlooked, and/or considered of little value. However, the great ones understand how important the details are and work hard to master them. As John Wooden said, “success is often found in the perfection of minor details.” Don’t be ignorant of the details and don’t underestimate their importance.
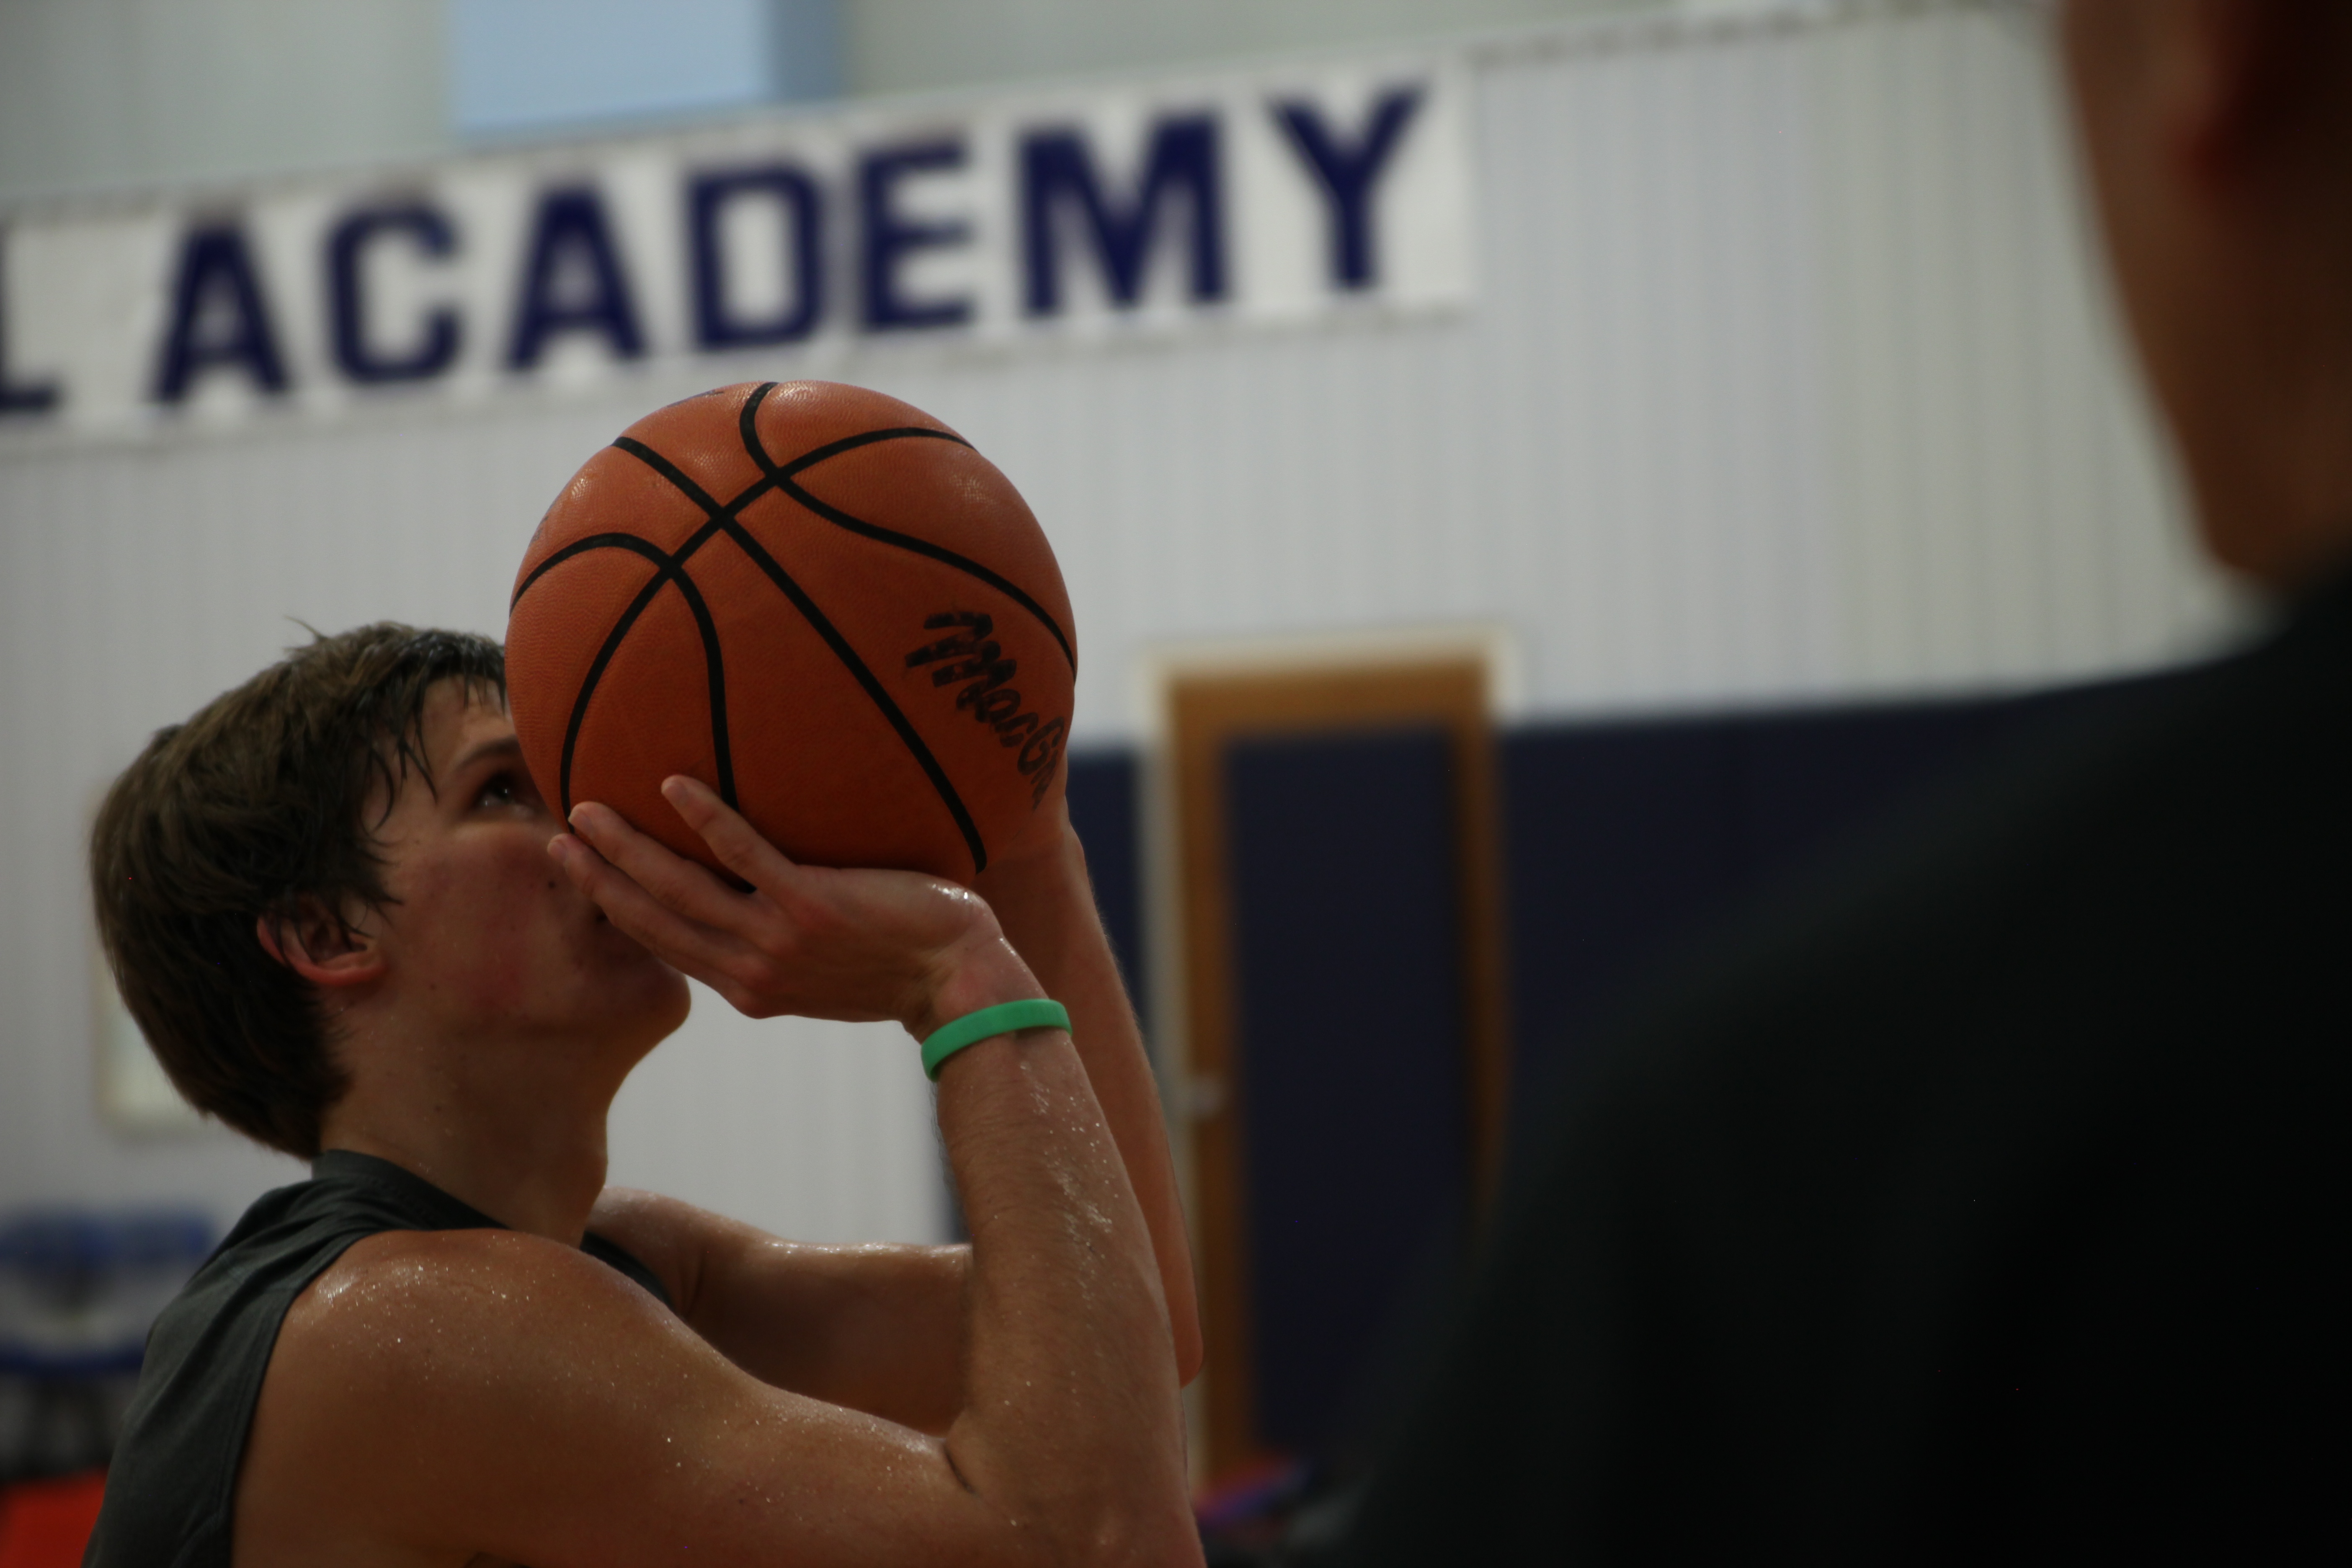
The first detail of shooting that we will discuss is in regard to hand placement/positioning. Hand placement is a crucial detail as it increases control and consistency when shooting the basketball. Being able to have control of the ball while shooting, as well as controlling both direction and distance is absolutely essential in being a consistent shooter. Both hands are involved in the shooting process but have different positions and responsibilities. The dominant hand is usually referred to as the “shooting hand”, while the non-dominant hand is usually referred to as the “guide hand”. There are specific details in regards to the purposes and functions of each hand which if mastered will result in more consistent results. The shooting hand will be discussed first and the guide hand second. However, both hands are of equal importance and neither should be considered as inferior or superior to the other one in the act of shooting.
The positioning and placement of the shooting hand is very important in order to shoot the ball more accurately and with greater control. The shooting hand should be spread wide and comfortably under the basketball with the wrist bent backward. We refer to this position as the “shooting platform”. This is where the ball rests and is held in position ready to shoot. It is important that your hand is spread wide as the ball will more likely rest on your fingers and finger pads rather than on the palm of your hand. It is important to have your wrist bent backward so you will be prepared to snap your wrist and not have to waste movement by cocking your wrist back as part of your shooting motion. As mentioned, it is important NOT to allow the ball to rest on the palm of your hand. This decreases control of the ball when shooting. We teach our students to have a “one-finger control gap” with the ball resting on the fingers and finger pads NOT on the fingertips. All this means is that there should be a slight gap between your palm and the basketball for you to slide your index finger into. If the ball is too much on your fingertips then there will be more than a “one-finger gap” and if the ball is resting on the palm of your hand then there will be no gap. Another detail is to have the ball resting on the outside edge of your thumb rather than the ball positioned on the top/tip of the thumb. Again, this will raise the ball too much off your hand and create too much of a gap between your palm and the ball. Lastly, the shooting hand should be positioned on the basketball so that the index finger is centered or slightly off-center to the left (for a right handed shooter). The index finger should be the last finger coming off the basketball when snapping your wrist and locking out your follow through.
As stated, the guide hand is of equal importance when shooting the basketball. The guide hand should be brought over to the ball and positioned loosely but fully on the side of the basketball. It is very important that the guide hand creates no tension in your shot nor interferes with your shot. Positioned properly, the guide hand should be vertical on the side of the basketball with the fingers pointing up and no gaps between the guide hand and the ball (100% contact). The guide hand should not be used to grip/grab the basketball or to assist in powering the ball to the basket. The guide hand is simply a mechanism to assist in controlling/holding the ball as well as keeping your shot straight. There should be no movement of the guide hand during the shooting process which would interfere with your shot. The most common mistake made with the guide hand is pushing/flicking/turning the guide hand when shooting. This will create streakiness in shooting rather than consistency. A simple rule is: “your guide hand guides the ball and your shooting hand shoots the ball.” We teach our students to keep their guide hand on the ball until the release point. The guide hand should finish high and straight and be held up with the shooting hand as part of the follow through. Both arms should be firm but relaxed. If used properly, the guide hand will remain in contact with the ball until the point of release, will stay straight, will not push/flick the ball in any way, and will finish high, straight, and vertical.
In summary, here are the details regarding both the shooting hand and the guide hand:
SHOOTING HAND
1. Hand spread wide under the ball
2. Index finger centered or slightly off center to the left (for a right hand shooter)
3. Have a one-finger gap between the ball and palm of hand
4. Ball rests on the outside edge of the thumb
5. Index finger / index and middle finger should be the last to leave the ball
GUIDE HAND
1. Loose on the side of the ball – no tension
2. Full contact on the ball until the point of release.
3. Hand should be vertical with the fingers pointing up
4. Does not push or flick the ball – stays straight and finishes high
5. Should be held up as part of the follow through finish, not dropped
Paying attention to the details makes a big difference. It is the little things that make the big things happen. These details, if embraced and mastered, will improve your accuracy, control, and consistency as a shooter. But remember, mastery is a process and never achieved through half-hearted commitment. Master the details.


